Hide & Seek

It seems that my camera cord and I are playing hide & seek, and it’s really really good at it. Unfortunately, this post won’t have any pictures that I’ve taken, so I hope that you’ll continue to read based on my charming personality and razor-sharp wit. No? It was worth a shot.

When I got home from Florida, my dad welcomed me with open arms and then held up a bunch of brown bananas and said “can you do something with these?” Aw, shucks, you shouldn’t have. You see, bananas and I haven’t really been the best of friends for the past 20-something years. There’s something about the smell and the texture that isn’t at all appealing to me. I truly enjoy the crunch of a crisp apple and the sweet juice that most fruit produces when bitten into. Bananas just don’t do it for me, but I was willing to work with them instead of tossing them in the trash. Upon opening the fridge, I saw a lonely zucchini and decided that if I could hide the bananas among a tasty zucchini bread, they wouldn’t be too terrible. Oh, and cinnamon. Lots of cinnamon.

A quick search led me to Anja’s Food 4 Thought recipe, which I adapted slightly because, well, that’s what I do. Since I scaled back on the oil in the recipe, I wanted to add a little fat in the form of walnuts and chocolate chips. Everything is better with walnuts and chocolate chips.  I was a little apprehensive to try one, but my family was chowing down on them quickly and they didn’t smell too strongly of bananas. I made mini muffins, so I carefully tore off the the top of the muffin (aka the best part) and took a bite. Even though I’m not a banana fan, these were pretty great. Am I switching to team banana now? Not by a long shot, but I may let it slide if one finds its way into my bread. But stay out of my smoothies, you hear me?

Chocolate Chip Walnut Zucchini Banana Bread

Adapted from Anja’s Food 4 Thought

1 1/2 cups whole wheat flour

1/2 tsp baking powder

1/2 tsp baking soda

1 tsp cinnamon

1 egg

1/4 cup plain yogurt

1/3 cup brown sugar

2 bananas, mashed

1 medium zucchini, grated

1/2 cup walnuts

1/3 cup chocolate chips

Preheat oven to 350°F

1. Mix dry ingredients together in a large bowl.

2. In a medium bowl, mash bananas and stir in brown sugar. Add egg and yogurt and stir to combine. Fold in shredded zucchini.

3. Add wet ingredients to dry ingredients, mix until incorporated. Fold in walnuts and chocolate chips.

4. Pour batter into mini muffin tins and bake 10-12 minutes

Thanks for your patience through my lack of pictures. In the mean time, here’s an image from one of my favorite websites, catalogliving.net

Elaine immediately regretted putting small dollops of sour cream on everyone’s plate at her bird-themed luncheon.

–Ariel

Yeee Haw

Since September, I’ve had the privilege of interning with the best team of social workers, nurses, psychiatrists, and nutritionists I could have ever hoped for. Unfortunately, but fortunately at the same time, the school year is ending, so I wanted to make everyone a little something to show my appreciation. Keep in mind that I’m also on a tight budget since this was an unpaid internship.

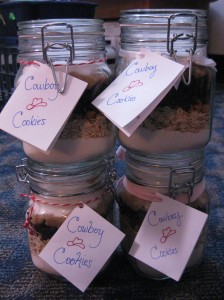
I found a bunch of glass jars at Marshall’s for $2.99 each, so I  decided I would make something to put inside. I was going back and forth between jam, some sort of preserves, or Smitten Kitchen’s chocolate-peanut spread which my sister made me and I’ve had to use all my willpower not to consumer in one sitting. I remembered seeing cookie mix in a jar somewhere, so I bought a few 1 liter jars and starting searching for recipes

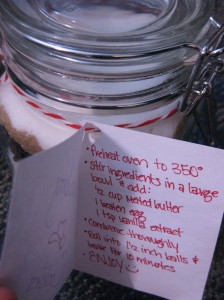
A quick google search lead me to Bakerella’s cowboy cookie post. I kept all the measurements the same except I subbed in butterscotch chips for m&ms (they were on sale) and I omitted the pecans (they were $10/lb! So not happening).

I used random scraps of ribbon I found in my apartment to tie on the little cards I made.

These were a huge hit. Not only do the layers look really pretty but everyone appreciates something homemade. I think I found my new go-to gift idea.

What’s your go-to gift on a budget idea?

–Ariel

Passover Time is the Best Time

Tonight is the start of my favorite holiday of the year- Passover. It is the one time of year that my entire family gets together, shares a looong meal and lots of laughs, as well as fantastic food.

Today will be spent cooking, cleaning, and getting ready for tonight’s seder, so expect some fantastic recipes this week! Just as I go to Marissa’s for Christmas, she comes to my house for Passover. It’s a good thing.

We’re taking advantage of all the delicious seasonal produce that’s available right now, but let’s be serious: in my mind, Passover is about the desserts.

My mom’s Mississippi Praline Meringues. Egg whites, brown sugar, and pecans. Easily my favorite cookie ever

Luckily chocolate is kosher for Passover

My sister and I have therefore dipped everything in sight. Did I mention I also have a cheesecake in the oven?

Be sure to check back for delicious updates. What are your favorite flour/yeast/baking powder free foods?

–Ariel

Ginger Kid

For the first time ever, I called in sick to my internship. I have been feeling pretty crappy for the past two days, but I was convinced that I would get better. Before I actually called it, I’m pretty sure I went through the 5 Stages of Grief. I denied up and down that I was sick. I even got out of bed this morning and went to the gym, only to feel exhausted and gross 5 minutes into my run. Then I got angry. I wanted to blame everyone with a sniffle for getting their tainted germs on me. I tried bargaining. “Maybe I’ll only go in to the hospital for a few hours and then ask my supervisor if I can leave early. Or maybe I can pump myself with DayQuil and come in late.” Depression came next- you know the whole “woe is me, I don’t feel well” whining. Lastly, I accepted that I have a nasty cold. And with acceptance, comes smoothies.

photo cred: the abundant life online


Last night, Mike was nice enough to drive my whiny butt to Trader Joe’s so that I could get some uncrystallized ginger. Whenever I was sick growing up, my mom would make me tea using freshly grated ginger, lemon juice, and honey. I wanted to try making the tea with uncrystallized ginger, but according to a Trader Joe’s employee, there is a ginger “shortage” and they aren’t sure when they’ll have it in stock. Crankyness ensued. I became frustrated with all chain stores, and decided that going to the tiny Oriental Grocery was our only option. While they were out of crystallized ginger, they sold fresh ginger for much less than the supermarket, so I grabbed about a pound. While I was waiting on line, a petite Chinese woman started chatting me up about all the ways I could use ginger. She told me that she usually makes tea with ginger and brown sugar as soon as she comes inside from the cold. She also said that she likes to add vinegar to help with digestion. As soon as I got home, I peeled and grated a small knob of ginger into a mug, added the juice of half a lemon, a drizzle of honey, and a little bit of cider vinegar. I then filled the mug with boiling water and muddled the ingredients a little.

After I made about 3 large cups of this concoction, I looked at the leftover ginger in the bottom of my mug. I didn’t want to just throw it away, but what could I use it for? Mike and I had already eaten dinner, so a marinade was out. Then it hit me. I’m going to use it in a smoothie.

Feel Better Smoothie – a Positive Regard Original
1/3 cup chopped fresh ginger (you can use less to suit your taste)
2/3 cup frozen blueberries
2/3 cup orange juice
6 frozen strawberries (that’s all I had left)
1/3 cup water
1 T cider vinegar
1 handful spinach
1 glug maple syrup or honey
Throw everything in your blender or food processor and blend until smooth! Or you can follow Alton Brown’s tips on smoothie making
When I first tasted this, I didn’t think it tasted like anything, so I asked Mike to taste it. One sip and his face perked up. I then realized that I had to blow my nose in order to taste anything.  This smoothie packs a lot of punch, especially from the ginger. Mike said that it really woke him up and gave him energy, and I certainly agree. I can see making this again as a great jump start to the day.
What are some of your home remedies?
–Ariel

Stir Fryday

Happy Friday, everyone! Is anyone else sick of the snow? Another day shoveling, slipping and sliding outside, plus work and dragging myself to the gym left me craving a massive meal. I had a craving for stir fry with a spicy sauce, and luckily had all the ingredients.

Marissa introduced me to Daily Garnish and told me to check out the post on peanut flour. If you haven’t already, read Emily’s post on peanut flours. I too am a nut butter lover and I think that this is a great alternative. Peanut flour has significantly less fat and calories per serving than peanut butter, while still containing a lot of protein.  Mike was nice enough to pick some up for me when he ventured out to Trader Joe’s the other day, and I must say, I am a big fan. I don’t count calories on a regular basis, but I am conscious of what and how much I put in my body. My running has decreased slightly due to my crazy schedule and because of the mass amounts of icy grossness outside. Using peanut flour allows me to get the satisfying taste of peanut butter with the benefits of protein, without the high calories. Win!


To make the sauce, measure out 2 tablespoons of peanut flour (or use 2 T of peanut butter). To hydrate the peanut flour, I added a few sprinkles of salt and 2 T of water

Ta-da! To the peanut butter, add 1 1/2 T soy sauce, 1 T warm water, a few drops of sriracha, 1/4 teaspoon ground ginger, 1/4 teaspoon garlic powder, and 1 T rice vinegar


oh! And 1 teaspoon maple syrup


Use the good stuff- it really makes a difference


Stir all the ingredients until combined.

I was worried that the sauce might not turn out as well as it might with peanut butter, but this out perfectly!


For the main meal, I chose the lazy microwave route. First I made some brown rice (1 part brown rice:3 parts water, microwave for 30 minutes), then chopped up kale, carrots, brussel sprouts, and peppers. For protein, I threw on a little tofu and a handful of edamame. Into the microwave for 6 minutes, and we’re good to go


Top with scallions if you like, and drizzle the peanut sauce on top.


This was very filling, fast, and delicious.


Peanut Sauce

Adapted from Bon Appetit

2 T peanut flour or peanut butter

1 1/2 T soy sauce

1 T warm water

1/4 teaspoon ground ginger

1/4 t garlic powder

1 T rice vinegar

1 t maple syrup

1/4 tsp red pepper flakes or sriracha

Combine all ingredients in a small bowl and whisk until incorporated. Drizzle over your favorite stir fry, chicken, or anything else you want to make more delicious!


Have you revamped any of your favorite recipes lately? We’d love to hear your new recipes!


–Ariel

The Boys are Back in Town!

And by the boys, I mean ME (Marissa)!

Hi, remember me? It’s been a while, I know…

It’s been a long few months, with a lot of ups and downs, but the cherry on top of it all is that I PASSED MY SOCIAL WORK BOARDS!!! I’m officially a Licensed Master of Social Work (LMSW)!!!!!!!!!!!!!!(there are not enough exclamation points to express my excitement!)

And here’s the story (best read in front of a roaring fire, if not possible, a warm laptop will suffice):

It was one of the coldest days in the metro New York area, and I headed down to midtown Manhattan to take my test. I’m a little crazy about getting place on time, or early, so I managed to have an hour to spare before I was scheduled to go in, so I took the opportunity to have a light lunch (peanut butter & jelly on whole grain bread; carbs and protein are your friends before a big test!) and gulp down a huge water bottle (stay hydrated!).

170 questions later, and I had to contain myself my squealing inside the room full of other people taking their exams, as “Congratulations, you’ve passed” came on the screen. See, lucky for me, they tell you immediately if you pass or fail, and I’m one for instant gratification.

Post test, I met up with my mom, and we celebrated by taking a frigid stroll through Herald Square. To celebrate, and help cope with the freezing wind, my mom was nice enough to purchase me a BRIGHT yellow pashmina scarf, right before we got into the subway. It’s been pretty much wrapped around me ever since. Plus, you probably don’t know this blog world, but I LOVE the color yellow. If I ever get around to any outfit posts (hello new years resolution?) you’ll see that…

Story’s over. Not as exciting as you were hoping for? That’s probably because I didn’t put in the pre-test anxiety part where I was nervous for ~6 months and would call Ariel almost sobbing. But that part’s boring.

Check out the hat I made since I’ve had an excess amount of time now that it’s not all spent studying!

Blammo! Yellow! See, I told you I loved yellow…

So, to wrap this bad boy up, I’m back folks! With 4 more initials at the end of my name: LMSW (Let’s Make Some Waffles?)!

-Marissa

Scooop There It Is

As promised, here I am with a post featuring my new ice cream maker! I know that many people are confused as to why I’m posting about a frozen dessert in December. With the holiday season upon us, I know that there are many delicious recipes circulating the internet for flaky pies, decadent cakes, crumbly cookies, and mouth-watering candies. All of those are well and good, but to be honest, they don’t tickle my fancy the way that ice cream does. I’ve mentioned before that I’m not much of a cake person, and while cookies and candy are great, I find that after a few bites, I don’t really want any more. I guess that’s a good thing in some sense, but when I have dessert, I want a decent-sized portion.

Enter: ice cream/sorbet/sherbet/gelato/granita. I don’t think I will ever get sick of frozen desserts. Well, I might get sick from them, but I will never get sick of them. See, I have a slight lactose intolerance, so I tend to stick to sorbet, but every once in a while, I eat ice cream anyway. It’s not so bad, I just get a stomach ache and then get extremely bloated and gassy. It’s probably worse for those around me than it is for me. TMI?

I kept going back and forth between recipes, as I wanted the first ice cream maker trial to be a good one. Anything seasonal is a win in my book, so I was considering apple cider sorbet. Just as I was about to grab my keys to go to the store, I spied 2 mangoes sitting in the fruit basket. Keeping with my resourceful motto to “use what you have,” I decided that I would make sorbet that required no trip to the supermarket. A quick search online led me to David Lebovitz’s recipe for mango sorbet.

I scanned over the recipe, and realized that I didn’t have any rum and had just used my last lime in a black bean stew. So what did I do? I improvised, of course! I went to the freezer, and grabbed a bottle of tequila that has been there for far too long (shows how much of a party animal I am). Seeing the tequila reminded me that I had a bottle of triple sec in the back of the fridge, which would stand in for the lime juice.

Seems like I’m making a margarita rather than sorbet right? Well trust me on this, because you will not be disappointed.

Add the fruit of 2 mangoes, 2/3 cup sugar, 2/3 cup water, 4 tsps triple sec, 1 T tequila, and a sprinkle of salt to your blender. Blend on the lowest setting at first, then increase the speed to ensure that there are no chunks of fruit left.

See? Nice and smooth. At this point, the recipe said that you should chill your mixture for an hour or so. Since I wanted instant gratification, I skipped this step. Whoops?

When your ice cream maker is all assembled, turn it on, and pour the mixture into the bowl.

It will look liquidy and delicious. Since I was so excited, I checked on it every 5 minutes. If you’re not as excitable as I am, you can check on it after 20 minutes.

This is the sorbet after 25 minutes. Does it look delightful?

The consistency is a cross between sorbet and soft-serve. I had to resist all urges to grab a big spoon and dig right in.

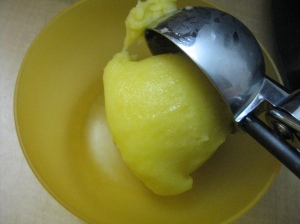
I took the classy broad approach and scooped the sorbet into a bowl. Don’t worry, I licked the ice cream scoop when I was done.

This sorbet was so so good. A slight aftertaste of tequila and triple sec led me to calling it Mango-rita Sorbet. I will absolutely make this again, maybe with a little less sugar as it was a touch too sweet for me, and mayhaps add some lime zest?

Mango Sorbet

Adapted from David Lebovitz

Ingredients
2 Large, Ripe Mangoes (2 lbs, 1 kg), peeled and pitted
2/3 Cup (130 g) Sugar
2/3 Cup (160 ml) Water
4 tsp Freshly Squeezed Lime Juice, plus more to taste (or triple sec)
1 Tbsp Dark Rum, plus more to taste (or tequila)
Pinch of Salt

Method

Cut the mangoes into chunks and put them in a blender with the sugar, water, lime juice, rum, and salt.

Puree the mixture until smooth. Taste, then add more lime juice or rum if desired. Allow the mixture to chill thoroughly, then freeze it in an ice cream maker.


Do any of you wonderful readers have a dessert that you never get sick of? Do you enjoy frozen treats even in the dead of winter? E-mail us at apositiveregard (at) gmail (dot) come!


–Ariel

Change is Good

I come from a family of extremely talented chefs. Our Thanksgiving is also what I like to call “deliciously unconventional.” While we have the usual mashed sweet potatoes with marshmallows on top and various cranberry sauces, we also have wild rice with water chestnuts, pickled grapes, caramelized pearl onions, 2 preparations of turkey (one roasted, one smoked), purple cabbage coleslaw, and cucumber salad. I wouldn’t have it any other way. I think I was the only one of my friends that hadn’t tried stuffing until last year.

As much as I love all the sides, Thanksgiving is all about the desserts. It is the only time of the year that my sister makes her famous apple cranberry pie, which is so good, that I would be content with eating just that. It is also the time of the year that I get to experiment with recipes suited for a larger crowd. Therefore the selection process takes a few days to complete. This usually consists of my sister and me sending each other links back and forth on gchat while we’re both at work.

This year, we agreed that the Bourbon Pumpkin Cheesecake from Smitten Kitchen would be the other dessert that we would make. What could be bad? The only problem was that my aunt called my mom the day before Thanksgiving to tell her that there would only be 9 people at dinner, not the 18 that we were anticipating. My aunt said that we probably wouldn’t need a second dessert, and that she could put out some fruit to go with the pie.

I wasn’t having it. I agreed that I wouldn’t make an entire cheesecake, but I decided that I wanted to keep the general pumpkin cheesecake theme. After searching various sites, I returned to trusty Martha Stewart for a recipe. But since I’m always trying to make things my own, I changed her recipe around a little. Sorry Martha, I hope you’ll forgive me and still leave me your empire when you retire. The original recipe for the Chocolate-Pumpkin Cheesecake Bars is here. Or you can follow the steps that I took:

Preheat your oven to 350° and line an 8″ square pan with aluminum foil

Place 4.5 ounces of gingersnaps and 2 tablespoons of brown sugar in the food processor

Pulse until your gingersnaps become gingercrumbs

Add in 4 tablespoons of melted butter, and pulse until incorporated

Place your gingersnap base into your prepared pan, and bake for 8-10 minutes

Since I was following the original recipe, which said to bake the crust for 12-15 minutes, my crust came out a little blackened. I have to say though, and my sister confirmed, that the crust tasted pretty darn good despite being slightly overbaked. It tasted more caramelized than burnt. Works for me!

Blend two blocks of cream cheese (I used neufchâtel) in your food processor until smooth

Add 2/3 cup sugar, 1 cup of pumpkin puree, 3 eggs, 3 tablespoon flour (I just realized that I totally forgot to add flour), 1 tsp cinnamon, 1/8 tsp cloves, and 1/2 tsp nutmeg to the food processor, and process until combined

Set up a double boiler- I use a saucepan with 1″ of water in the bottom, and a metal bowl placed on top. Make sure to use an oven mitt when handling the bowl!

Add 1/2 cup of chocolate chips to the bowl and stir frequently until melted

I used semi-sweet chocolate, but you could use milk or dark chocolate too.

Once your chocolate is melted, take the bowl off of the saucepan to cool slightly.

Measure out 1 cup of the pumpkin cheesecake mixture, and add it to the bowl of melted chocolate

Stir to combine the cheesecake and the chocolate

Pour the pumpkin cheesecake mixture onto the now cooled crust

Drop tablespoons of the chocolate pumpkin cheesecake mixture into the pumpkin cheesecake

I placed 8 large dollops and a few smaller ones with the chocolate pumpkin mixture, and just kept adding to them until there wasn’t any mixture left

The dollops do not expand outward, but sink to the bottom, which is a good thing. I didn’t want to make too many circles because I wanted there to be a nice pumpkin-chocolate swirl

To make a swirl, place a knife at one side of the pan, and then drag it across to the other side

Continue to do this all the way up the pan widthwise, and then do it lengthwise

Pop it in the oven for 50 minutes, or until a toothpick inserted into the center comes out clean

When the cheesecake cools, put it in the fridge for a few hours

Although the original recipe states that it makes 16, I cut the cheesecake into 32 bars. I think that people are more likely to eat dessert after a big meal if it is in smaller portions. Notice how most people ask for just a sliver of pie?

If you make the bars smaller, then you can also trick yourself into thinking that it’s not that bad if you go back for seconds or thirds. They’re that good. So good, in fact, that I think these will have a permanent place on the Thanksgiving dessert table


Chocolate-Pumpkin Cheesecake Bars

Adapted from Martha Stewart

For the crust:

  • 4.5 ounces gingersnaps
  • 2 tablespoons brown sugar
  • 4 tablespoons unsalted butter, melted

For the filling:

  • 2 packages bar cream cheese, (8 ounces each)
  • 2/3 cup sugar
  • 1 cup canned solid-pack pumpkin puree
  • 3 large eggs
  • 3 tablespoons all-purpose flour
  • 1 teaspoon cinnamon
  • 1/2 tsp nutmeg
  • 1/8 tsp cloves
  • 1/2 semisweet chocolate chips

Directions

  1. Preheat oven to 350 degrees. Line bottom and sides of an 8-inch square baking pan with  aluminum foil. Set aside.
  2. In a food processor, blend cookies with sugar until finely ground; add butter, and pulse until incorporated.
  3. Transfer crumb mixture to prepared pan, and press gently into bottom. Bake until fragrant and slightly firm, 8 to 10 minutes. Set aside to cool.
  4. Place cream cheese in food processor; blend until smooth. Add sugar, pumpkin puree, eggs, flour, and spices; process until combined.
  5. Place chocolate in a double boiler or a microwave-safe bowl; microwave in 30-second increments, stirring between each, until melted, or stir in double boiler until melted. Add 1 cup pumpkin mixture; stir to combine.
  6. Pour remaining pumpkin mixture into prepared crust. Drop dollops of chocolate mixture onto pumpkin mixture; swirl. Bake about 50 minutes.
  7. Cool in pan. Cover; chill until firm, at least 2 hours (and up to 2 days).

How was everyone’s Thanksgiving? Did you try out any new recipes or stick to the oldies but goodies? We’d love to hear about your kitchen adventures! Email the Positive Regard girls at apositiveregard (at) gmail (dot) com

–Ariel


All That Glitters Is Gourd

Autumn is hands down my favorite season.

The leaves changing colors, sweater weather, the pumpkins, the glitter… Ok, so the glitter isn’t necessarily autumn specific, but I thought why not incorporate some sparkle into some fall favorites?

Gourds are a great way to incorporate some autumn decor indoors. I picked up a few (3 for a $1!) a couple of weekends ago visiting my sister further upstate New York, where she goes to college. When I got home with them, I thought they could use a little ‘bling’.

BAM! That’s a sparkly gourd!

Materials:

Glue (I used a Martha Stewart brand ‘glittering glue’ but I’m pretty sure a white Elmer’s glue would work just fine.)

Brush

Glitter (I used a Martha Stewart brand superfine glitter.)

Gourds

Newspaper

Process:

1. Prep your area by covering it in at least as many layers of newspaper as colors of glitter you will be using. This is so the excess glitter of one color does not end up on a gourd of another color if you have to put it down.

2.. Hold gourd by stem and base with two fingers. Coat the entire gourd lightly in glue. Make sure there are no drips. I left the base of the gourd free of glue so it wouldn’t stick to the newspaper once I put it down.

3. Lightly sprinkle glitter over the entire gourd as you rotate it. When you are 3/4 of the way through, you can use the excess glitter that has fallen onto the newspaper to fill in the rest. No wasting!

4. Your gourd is complete! Allow it to dry according to the directions on your glue. I brought mine outside to the sunshine to help the process. Once the glue has dried, there may be some excess glitter, just shake it off.

5. Continue with the rest of your gourds and glitter colors.

6. Arrange your gourds and display!

I also just wanted to show you guys how adorable they looked drying outside next to their bigger pumpkin friends!

If it wasn’t that I knew it was going to rain that night, I might have kept them out there.

Obviously the possibilities are limitless… Stripes, polka dots, more intricate designs on bigger gourds or even pumpkins!

Are there any autumnal crafts that you have done with gourds or glitter?

-Marissa